What Is Domain Privacy Protection?

What Is Domain Privacy Protection?
July 12, 2025

🔒 What Is Domain Privacy Protection? A Complete Guide When you register a domain name for your website, your personal information doesn’t just stay private—it’s automatically stored in a public database called WHOIS. This means your name, phone number, address, and email can be accessed by anyone. Domain Privacy Protection (also known as WHOIS Privacy) is a service that shields your personal data from the public eye, protecting you from spam, scams, and unwanted solicitations. Let’s explore how it works, why it’s important, and how to activate it for your domain. 🧾 What Happens When You Register a Domain? When you register a domain (e.g., yourname.com), the Internet Corporation for Assigned Names and Numbers (ICANN) requires you to provide accurate contact information, including: Your full name Email address Phone number Physical mailing address This data is stored in the WHOIS database, which is publicly searchable. Anyone—from hackers to marketers—can look it up unless you take action to hide it. 🔐 What Is Domain Privacy Protection? Domain Privacy Protection is a service offered by domain registrars that replaces your personal information with generic proxy details in the WHOIS database. Without Privacy Protection: makefile CopyEdit Name: John Doe Email: johndoe@gmail.com Phone: +1-555-123-4567 With Privacy Protection: makefile CopyEdit Name: Domain Protection Services Email: contact@privacyprotect.com Phone: +1-555-000-0000 Visitors still have a way to reach you (via the proxy email), but your real information stays private. 🛡️ Why You Need Domain Privacy Protection ✔️ 1. Protects Your Identity Your domain is tied to your business or personal brand. Domain Privacy Protection ensures your private data stays safe from cybercriminals and identity thieves. ✔️ 2. Prevents Spam and Telemarketing Once your email and phone number are public, you’re likely to receive: Spam emails Robocalls Fake invoices Unwanted sales pitches Privacy Protection filters these out before they reach you. ✔️ 3. Stops Domain Hijacking Attempts Cybercriminals may try to use your contact info to impersonate you and gain access to your domain. Keeping your details hidden makes this significantly harder. ✔️ 4. Improves Professionalism Your website looks more trustworthy when personal data isn’t exposed. It shows you take privacy seriously. ✔️ 5. Protects You from Competitor Scraping Competitors or bots may scrape WHOIS data to gather intelligence on your business. Domain Privacy Protection blocks this tactic. 💰 Is Domain Privacy Protection Free? Some domain registrars offer privacy protection free of charge, while others may charge an annual fee ($5–$15 per year). Always check with your registrar. Popular registrars that include free privacy: Namecheap Google Domains Cloudflare Porkbun Others like GoDaddy or Bluehost may charge extra. ⚙️ How to Enable Domain Privacy Protection Here’s how to enable it (steps may vary by provider): Log in to your domain registrar account. Go to your Domain Management or Domain Settings section. Find the option labeled “Privacy Protection” or “WHOIS Privacy.” Enable or activate the feature. Confirm changes and check the WHOIS database to verify it’s working. Note: Some domain extensions (like .us) do not allow privacy protection due to registry rules. 🌍 Is Domain Privacy Protection GDPR-Compliant? Yes. Under GDPR, domain registrars are required to protect the personal data of EU residents. However, Domain Privacy Protection adds an extra layer of safety, particularly for global users and domains not covered under GDPR. 🔄 Domain Privacy vs Domain Lock Domain Privacy: Hides your personal info from WHOIS. Domain Lock: Prevents unauthorized domain transfers or changes. Both features are essential for protecting your domain name. ✅ Final Thoughts: Is Domain Privacy Protection Worth It? Absolutely. Whether you’re a blogger, entrepreneur, freelancer, or business owner, Domain Privacy Protection is a simple, affordable way to: Maintain anonymity Avoid spam and harassment Defend your domain from malicious actors It’s a small investment with huge peace-of-mind returns. If your registrar offers it for free, enable it right away. If not, it’s well worth the modest cost.

How to Set Up a Coming Soon Page
July 12, 2025

🛠️ How to Set Up a Coming Soon Page: Step-by-Step Guide A Coming Soon page is more than just a placeholder — it’s a strategic marketing tool that builds anticipation, captures leads, and sets the stage for your launch. Whether you’re building a new website, launching a product, or rebranding, setting up a professional Coming Soon page ensures you don’t lose out on early traffic or engagement. This step-by-step guide walks you through how to create a high-converting Coming Soon page — even if you’re not a designer or developer. 🚀 Why You Need a Coming Soon Page A Coming Soon page helps you: 🚧 Keep visitors engaged while your site is under construction 🧠 Build brand awareness before launch 📩 Collect email leads or pre-registrations 📊 Test traffic and gauge interest 💬 Share updates and build a social following Pro Tip: Google also indexes Coming Soon pages — a great head-start for SEO! ✅ Steps to Set Up a Coming Soon Page 🔹Step 1: Choose Your Platform or Tool Depending on your tech stack, choose how you’ll create the page: WordPress: Use plugins like SeedProd, Coming Soon & Maintenance Mode, or Elementor. Website Builders: Platforms like Wix, Squarespace, and Webflow offer ready-made templates. HTML/CSS: For custom builds, you can create a simple static page with countdowns and form embeds. SaaS Tools: Services like Carrd, LaunchRock, and Unbounce help you launch quickly with minimal effort. 🔹Step 2: Get a Domain & Hosting If you haven’t already: Buy a domain name that reflects your brand or product. Choose a hosting plan that allows basic site deployment. Ensure SSL is installed for security and trust. Tip: Many Coming Soon tools work with your existing CMS or allow standalone deployment with just hosting access. 🔹Step 3: Design the Page Use a clean, eye-catching design that includes: Your logo or brand name A clear “Coming Soon” message Launch date or a countdown timer A brief description of what’s launching An email sign-up form Social media links or handles Contact info or a support link (optional) Optional: Add a teaser video, product preview, or “Request Access” button to build hype. 🔹Step 4: Write SEO-Friendly Copy Yes — even your Coming Soon page should be optimized for search engines! Include: A keyword-rich page title and meta description Headers (H1, H2) with relevant terms like “Coming Soon,” “Launching Soon,” or “New Website Launch” Alt text for any images Internal links (if it’s part of a larger domain) Example Meta Description:“Exciting things are coming! Sign up to get notified when we launch our brand-new website and product. Stay tuned — launching soon.” 🔹Step 5: Add an Email Sign-Up Form Capture leads early using: Email marketing tools: Mailchimp, ConvertKit, Brevo (Sendinblue), or Klaviyo Integration with your CMS or plugin Incentives like early access, exclusive offers, or free resources Collect email addresses so you can send: Launch alerts Pre-launch offers Behind-the-scenes updates 🔹Step 6: Include a Countdown Timer (Optional) A countdown creates urgency and excitement. You can add: Built-in timers from WordPress plugins or website builders JavaScript-based countdowns for custom HTML pages Make sure the date is realistic — and stick to it! 🔹Step 7: Connect Your Analytics Tools Track visitors and behavior with: Google Analytics – Know where traffic is coming from Facebook Pixel – Retarget future visitors Hotjar or Microsoft Clarity – See how users interact with your page These insights help you shape your full site for launch. 🔹Step 8: Make It Mobile-Friendly More than 60% of web traffic comes from mobile devices. Make sure your Coming Soon page: Loads fast Is responsive on all screen sizes Has tap-friendly buttons and forms Test it on multiple devices before going live. 🔹Step 9: Launch and Promote It Once your Coming Soon page is live: Share it on your social media channels Add the link to your email signature Promote it through paid ads Send to your existing contacts or followers Every early visitor is a potential customer — don’t waste the traffic. 🔹Step 10: Monitor & Update Keep your Coming Soon page fresh by: Updating the launch date if it changes Sharing new teaser info Adding social proof or testimonials if available Let users know your project is active and progressing! 🧠 Final Thoughts: Your Pre-Launch Secret Weapon A Coming Soon page is a small but powerful tool that sets the tone for your entire launch. With the right design, content, and strategy, it helps you build buzz, collect leads, and launch with momentum. Don’t wait until your site is perfect — launch a Coming Soon page today and grow while you build.

Steps to Launch Your Website in a Day
July 12, 2025

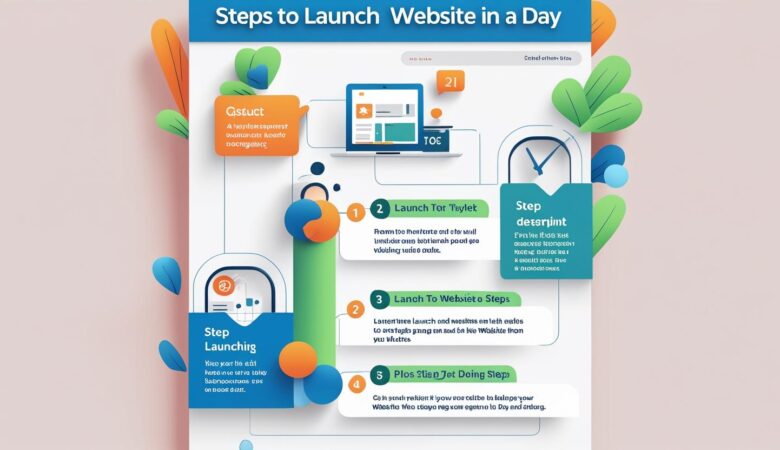
🚀 Steps to Launch Your Website in a Day: A Complete Guide You don’t need weeks or a tech team to get your website online. Whether you’re launching a business, personal brand, portfolio, or blog, it’s completely possible to build and launch a professional website in just one day—if you follow the right steps. This step-by-step guide will walk you through everything you need to know to get your site live quickly and efficiently. ✅ Step 1: Choose a Domain Name Your domain is your website’s address on the internet (like www.yourbrand.com). It should be: Short and memorable Easy to spell and pronounce Relevant to your brand or service Ideally ending in .com, .net, or a region-specific extension like .in Tip: Use domain name generators or registrars like GoDaddy, Namecheap, or Google Domains to search for availability. ✅ Step 2: Select a Hosting Provider You need a reliable web host to make your website accessible to the world. For a fast launch, choose a hosting provider that offers: One-click CMS (WordPress, Wix, Shopify) installation Free SSL certificate 24/7 support Scalable plans Recommended Hosting Types: Shared Hosting – Best for basic websites or blogs Cloud Hosting – Great for speed and flexibility Managed WordPress Hosting – Ideal for WordPress users Pro Tip: Pick a provider with global data centers for faster page loads. ✅ Step 3: Install a Content Management System (CMS) A CMS allows you to build your website without coding. The most popular options include: WordPress (Flexible, best for blogs and business sites) Wix (Beginner-friendly, drag-and-drop) Squarespace (Great design templates) Shopify (For ecommerce websites) Choose one based on your needs. Most hosts offer 1-click installs for WordPress and other platforms. ✅ Step 4: Pick a Template or Theme Once your CMS is installed, choose a professional template or theme that fits your brand. Look for: Mobile responsiveness Fast loading speeds SEO-friendly structure Easy customization This saves hours in design and helps you focus on content. ✅ Step 5: Customize Your Website Now it’s time to add your personal touch: Upload your logo Choose a color scheme and font style Create your navigation menu Add essential pages: Home About Services/Products Blog Contact Use royalty-free images or tools like Canva for visuals if needed. ✅ Step 6: Add Content That Converts Write clear, concise, and SEO-friendly content: Use headings (H1, H2, H3) to structure pages Include target keywords naturally Add internal links to key pages Use call-to-action buttons (e.g., “Contact Us”, “Buy Now”) Tip: Install SEO plugins like Yoast SEO or RankMath if using WordPress. ✅ Step 7: Set Up Essential Tools Before going live, install and configure tools to track performance and ensure security: Google Analytics – Track traffic and user behavior Google Search Console – Monitor SEO performance SSL Certificate – Encrypt your site for safety (most hosts include this) Security Plugin – Like Wordfence or Sucuri (for WordPress) Backup Tool – Regular backups protect your site in case of data loss ✅ Step 8: Preview & Test Go through your website to: Test links and buttons Check for spelling errors Ensure mobile and browser compatibility Test page speed using tools like GTmetrix or Google PageSpeed Insights Make adjustments as needed to ensure a smooth user experience. ✅ Step 9: Publish Your Website Once everything looks perfect, hit PUBLISH! Your site is now live and accessible to the world. Share it on your social media, email list, and business cards to drive traffic right away. ✅ Step 10: Plan Ongoing Maintenance Even after launch, your website needs attention: Regular updates to plugins and themes Content updates (blog posts, new services, etc.) Performance optimization SEO improvements 🌐 Final Thoughts: Yes, You Can Launch Today Launching a website in one day might sound intimidating, but with the right tools and guidance, it’s absolutely doable. Whether you’re building a personal portfolio, an online store, or a startup site, follow these steps and you’ll be live before the day ends.

Choosing the Best Hosting Plan for Startups
July 12, 2025

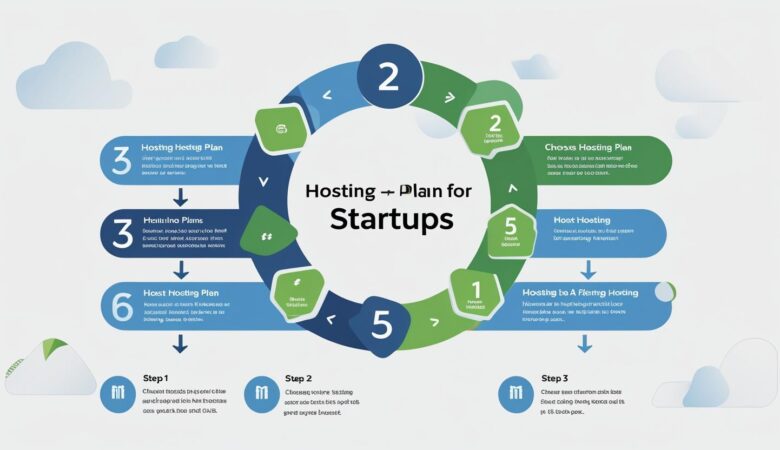
💡 Choosing the Best Hosting Plan for Startups: A Complete Guide Launching a startup is exciting—but it comes with a mountain of decisions. One of the most important is selecting the right hosting plan for your website. Your hosting choice will directly impact your website speed, security, scalability, and ultimately, your user experience and SEO ranking. This guide breaks down what startups should look for in a hosting plan and how to make the best choice based on budget, traffic expectations, and future growth. 🚀 Why Hosting Matters for Startups Your hosting provider is the foundation of your online presence. A poor hosting choice can lead to: Slow page loading times Frequent downtime Poor Google rankings Loss of customer trust Limited growth potential Startups need a hosting plan that is affordable, reliable, and scalable — without compromising on performance or security. 🧩 Key Factors to Consider When Choosing a Hosting Plan 1. Budget-Friendly Yet Reliable As a startup, you may not have a large IT budget. Look for hosting providers that offer cost-effective plans with essential features like uptime guarantees, SSL certificates, and technical support. 2. Performance & Speed Fast-loading websites enhance user experience and SEO. Hosting plans with SSD storage, CDN integration, and optimized server configurations are essential for startups. 3. Scalability You may be starting small, but your hosting should grow with you. Choose a provider that offers easy upgrades to VPS, cloud, or dedicated servers as your traffic increases. 4. Security Features Startups often overlook security — until it’s too late. Ensure your host provides: Free SSL certificates Malware scanning DDoS protection Regular backups 5. Support and Uptime Choose a host that guarantees 99.9% uptime and provides 24/7 support. Technical issues can arise anytime, and responsive support can save your business from downtime-related losses. 🔍 Comparing Hosting Types for Startups ✅ Shared Hosting – Best for Early Stage Pros: Affordable, easy to set up, good for low traffic Cons: Limited resources, slower during traffic spikes Ideal for: MVPs, landing pages, basic company sites ✅ VPS Hosting – For Growing Startups Pros: Dedicated resources, faster speeds, better control Cons: More expensive than shared Ideal for: Startups with moderate traffic and growing demands ✅ Cloud Hosting – Scalable & Flexible Pros: Pay-as-you-go, easy scaling, high uptime Cons: Slightly complex to manage Ideal for: SaaS startups, ecommerce, app hosting ✅ Dedicated Hosting – High-Performance Option Pros: Full control, unmatched speed and security Cons: Expensive and requires technical knowledge Ideal for: Large, well-funded startups with high traffic 🛠️ Essential Hosting Features for Startups 1-Click Installers for WordPress or CMS Free domain or email services Developer tools (SSH access, Git, staging) Integrated backups Analytics and performance tools 🧠 Expert Tip: Don’t Just Go for the Cheapest Option While it may be tempting to select the lowest-priced hosting, remember that your hosting impacts customer experience, site speed, and Google ranking. Paying a little more for a reliable and scalable solution pays off in the long run. 🧭 Final Thoughts: Choose Smart, Grow Faster Choosing the best hosting plan for your startup isn’t just a technical decision—it’s a strategic one. A fast, secure, and scalable hosting plan will empower you to build trust with your audience, rank better on Google, and grow without limits. 🚀 Whether you’re launching an MVP, a portfolio, or a full-scale SaaS product, the right hosting partner gives your startup the foundation it needs to succeed.

Impact of Hosting on Page Load Time
July 12, 2025

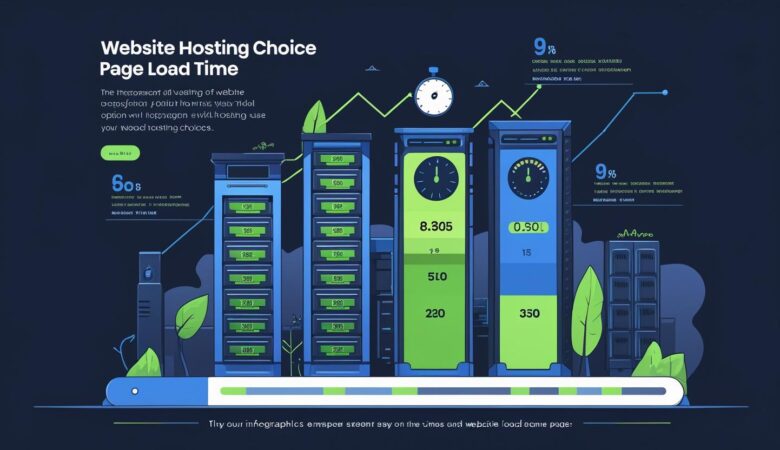
🚀 The Impact of Hosting on Page Load Time: Why It Matters for SEO and User Experience When it comes to building a high-performing website, page load time is not just a technical metric—it’s a critical factor that directly influences your SEO ranking, user satisfaction, and conversion rate. One of the most overlooked contributors to slow website speed is your web hosting provider. Let’s dive into how hosting affects website speed and why choosing the right host can make or break your online presence. 🔍 What Is Page Load Time? Page load time refers to the time it takes for a web page to fully display its content after a user clicks on a link or types in a URL. Google recommends that a site loads in under 2.5 seconds for optimal user experience. Anything longer, and your visitors are likely to bounce—harming both traffic and sales. 🖥️ How Web Hosting Affects Load Time 1. Server Performance & Speed Your host’s server hardware and software configurations significantly impact how fast your site loads. Premium hosting companies invest in high-speed SSDs, modern processors, and updated server environments, delivering content quickly to users. 2. Hosting Type Shared Hosting: Resources are split between multiple websites, leading to slower load times during peak hours. VPS (Virtual Private Server): Offers better speed with dedicated portions of a physical server. Dedicated Hosting: Full control and optimal speed, best for high-traffic or resource-intensive websites. Cloud Hosting: Highly scalable and efficient, ensuring faster load times even during traffic spikes. 3. Data Center Location The closer your server is to your audience, the faster the content will load. Many hosts allow you to choose a server location for optimal speed across regions. 4. Bandwidth and Resource Allocation Low-tier hosting plans often limit bandwidth and memory, causing delays as your site tries to load images, videos, or scripts. Investing in better hosting ensures smoother delivery and better performance. 5. Uptime and Downtime Frequent downtime means not only lost traffic but also poor SEO signals to Google. Quality hosts offer 99.9% uptime guarantees to keep your site consistently available and fast. 6. Built-in Performance Features Top hosting providers offer integrated features such as: Content Delivery Networks (CDNs) Caching tools Image optimization One-click performance plugins These tools reduce the time it takes for content to reach the user’s browser. 📊 Hosting and SEO: A Direct Link Google’s algorithm prioritizes websites that load quickly and are consistently available. A few ways hosting directly impacts SEO: Improved Core Web Vitals scores Lower bounce rates Faster indexing by search engines Higher user engagement and conversions If your website is slow, even the best content and SEO strategies won’t be enough to rank well. Hosting is the technical foundation that supports all your digital marketing efforts. 🧠 User Experience Matters Beyond SEO, a faster site offers a better user experience: Visitors stay longer Pages are easier to navigate Conversion paths are smoother Mobile users experience fewer delays In an era where every second counts, even a 1-second delay can result in a 7% drop in conversions. ✅ Final Thoughts: Choose Hosting That Supports Speed Investing in the right hosting provider is a strategic decision. It’s not just about having a website—it’s about having a fast, reliable, and secure platform that supports growth. If you’re experiencing lag, high bounce rates, or poor SEO results, it may be time to upgrade your hosting. 📌 Pro Tip: When evaluating a hosting provider, check for: SSD storage Global CDN integration Server location choices 24/7 technical support Proven uptime history Scalable plans as you grow In conclusion, the impact of hosting on page load time is undeniable. A quality host improves speed, boosts SEO, and enhances user satisfaction—giving your website a competitive edge in a crowded digital world.

How to Schedule Auto Backups with HiveRift
July 12, 2025

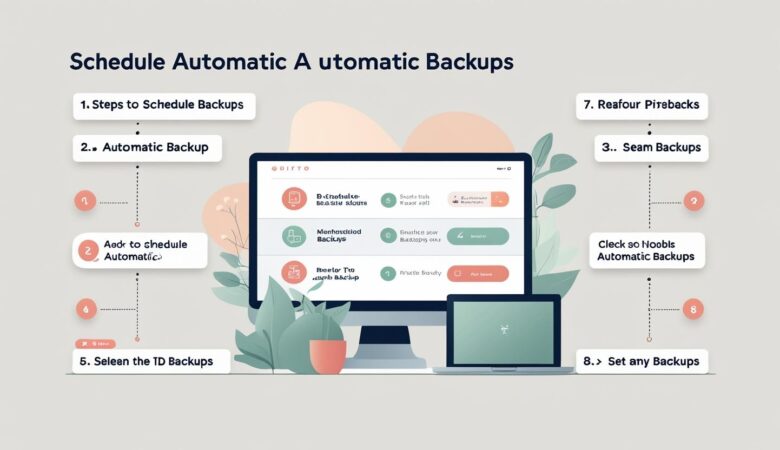
How to Schedule Auto Backups with HiveRift 📌 Introduction Backing up your website is essential for protecting your data from crashes, hacks, or accidental changes. With HiveRift Hosting, you can easily schedule automatic backups so your website files, emails, and databases are safe—without any manual effort. Here’s a step-by-step guide to help you schedule auto backups using HiveRift’s hosting panel. 🛠️ Step-by-Step: Schedule Auto Backups on HiveRift ✅ Step 1: Log In to HiveRift cPanel Visit hiverift.com and log in Access your hosting account Open cPanel from your hosting dashboard ✅ Step 2: Open JetBackup or Backup Wizard Scroll to the “Files” section Click on JetBackup or Backup Wizard (based on your hosting plan) Select Schedule Backup or Backup Jobs ✅ Step 3: Configure Backup Schedule Choose what you want to back up: Full Account Home Directory MySQL Databases Email Accounts Set the frequency: Daily, Weekly, Monthly, or Custom Set retention (how many copies to keep) ✅ Step 4: Choose Backup Destination (Optional) You can back up to: Server storage (default) Remote FTP/SFTP server Google Drive or Dropbox (if supported) ✅ Step 5: Save & Monitor Click Save Backup Schedule Monitor backup status or restore from previous versions anytime from the JetBackup dashboard 🔒 Why Auto Backups Matter Protection from hacking & malware Quick restore after site crashes Safe updates & plugin testing Peace of mind for business owners 📦 HiveRift Backup Features JetBackup or cPanel Backup support Daily/weekly automatic backup options One-click restore functionality Easy integration with cloud storage (optional) 24/7 support for backup help ✅ Conclusion Scheduling auto backups on HiveRift is a smart way to safeguard your website. It ensures your data is always recoverable, even if something goes wrong. Just set it once—and relax knowing your site is safe.

How to Set Up Business Emails
July 12, 2025

How to Set Up Business Emails 📌 Introduction A professional business email like info@yourcompany.com builds trust and strengthens your brand identity. If you’re hosting your website with HiveRift.com, setting up a business email is quick and easy. Here’s a complete step-by-step guide to help you set up business emails using HiveRift’s hosting panel. 🛠️ Step-by-Step: Create a Business Email on HiveRift ✅ Step 1: Log in to Your HiveRift cPanel Go to hiverift.com Login to your hosting account Access cPanel from your dashboard ✅ Step 2: Go to “Email Accounts” In cPanel, locate the “Email” section Click on “Email Accounts” Click “Create” ✅ Step 3: Enter Email Details Choose your domain (e.g., yourdomain.com) Create the email prefix (e.g., sales, info, contact) Set a strong password Optionally, set a mailbox quota (or leave it unlimited) ✅ Step 4: Access Your Email Once created, click on “Check Email” Choose a webmail client like Roundcube to access emails You can now send and receive emails from your new business address ✅ Step 5: Configure Email on Mobile or PC (Optional) To connect your business email with apps like Gmail, Outlook, or iPhone Mail: Go to Email Configuration Settings in HiveRift Use the IMAP/POP & SMTP details Enter credentials into your preferred email client ✉️ Benefits of HiveRift Business Email Professional email (yourname@yourdomain.com) Spam protection & SSL security Easy access via webmail or any device Perfect for startups & small businesses 24/7 support included ✅ Conclusion With HiveRift.com, creating a professional business email is simple and efficient. Whether you’re a freelancer or running a company, a custom domain email builds trust and gives your brand a polished look.

How to Manage Your Website Through cPanel
July 12, 2025

How to Manage Your Website Through cPanel 📌 Introduction cPanel is one of the most popular web hosting control panels, designed to make website management easy, even for beginners. With a simple dashboard, you can control everything — from files and emails to backups and databases — in just a few clicks. Here’s a beginner-friendly guide on how to manage your website through cPanel. 🧭 Step-by-Step: How to Use cPanel for Website Management 🗂️ 1. Accessing cPanel Login via yourdomain.com/cpanel Enter your username and password (provided by your hosting provider) 📁 2. File Management with File Manager Navigate to the File Manager Access your website files in the public_html folder Upload, edit, or delete HTML, PHP, CSS, and image files No need for FTP software 📧 3. Create and Manage Email Accounts Click on Email Accounts Create custom email addresses like info@yourdomain.com Set mailbox quota, passwords, and configure email clients 🛡️ 4. Add SSL & Secure Your Site Go to SSL/TLS or Let’s Encrypt Install Free SSL Certificate for HTTPS Boosts security and SEO 🧰 5. Install Apps with Softaculous Use Softaculous App Installer 1-click install WordPress, Joomla, Drupal, etc. Great for beginners who don’t want to code 🗃️ 6. Manage Databases Use MySQL Databases to create new databases Use phpMyAdmin to view, edit, or import/export data Essential for dynamic websites like WordPress 🌐 7. Manage Domains & Subdomains Add new domains or create subdomains (e.g., blog.yourdomain.com) Manage DNS settings, redirects, and parked domains ♻️ 8. Backup & Restore Your Website Go to Backup Wizard Download full or partial backups Restore site files, databases, and email ✅ Conclusion cPanel gives you complete control over your website with a user-friendly interface. Whether you’re a beginner or an experienced webmaster, learning to manage your website through cPanel will save you time, effort, and give you full control over your online presence.

How to Use FTP to Upload Website Files
July 12, 2025

How to Use FTP to Upload Website Files 📌 Introduction FTP (File Transfer Protocol) is one of the most reliable methods to upload website files from your computer to your web server. Whether you’re managing a static site or a WordPress installation, FTP makes the file transfer process fast and secure. In this guide, you’ll learn how to use FTP to upload files using tools like FileZilla or Cyberduck. 🔧 What You Need Before You Start A web hosting account (like HiveRift, Hostinger, etc.) FTP credentials: Hostname (e.g., ftp.yourdomain.com) Username Password Port (usually 21) An FTP client (e.g., FileZilla, Cyberduck, WinSCP) 🛠️ Step-by-Step: How to Upload Files Using FTP ✅ Step 1: Install an FTP Client Download and install FileZilla or another FTP client on your computer. ✅ Step 2: Enter FTP Credentials Open FileZilla and go to File > Site Manager. Click New Site, then enter: Host: ftp.yourdomain.com Port: 21 Protocol: FTP – File Transfer Protocol Login Type: Normal Username/Password: Provided by your hosting provider Click Connect. ✅ Step 3: Navigate to Your Website Folder Once connected, you’ll see your computer’s files on the left and your website files on the right (server side). Navigate to your public_html or www folder on the server — this is where your website files should go. ✅ Step 4: Upload Your Files Drag and drop your website files (HTML, CSS, images, etc.) from your local system (left pane) into the server folder (right pane). ✅ Step 5: Verify Upload Open your browser and visit your domain (e.g., www.yourdomain.com) to check if the website is live. 🧩 Common FTP Errors & Fixes Error Solution Connection timeout Check hostname/port/firewall settings Permission denied Ensure correct folder permissions Transfer failed Switch from Passive to Active mode in FTP client 🧾 Tips for Safe FTP Use Always use SFTP (Secure FTP) if available Keep your FTP password strong and confidential Delete or limit FTP access when not in use Regularly backup website files before uploading ✅ Conclusion Using FTP to upload website files is easy, fast, and secure — especially for managing large projects or manual file edits. With the right tools and a little practice, you’ll have full control over your website’s file system. Would you like a video script, infographic, or PDF tutorial version of this content?

Email Hosting vs Web Hosting
July 12, 2025

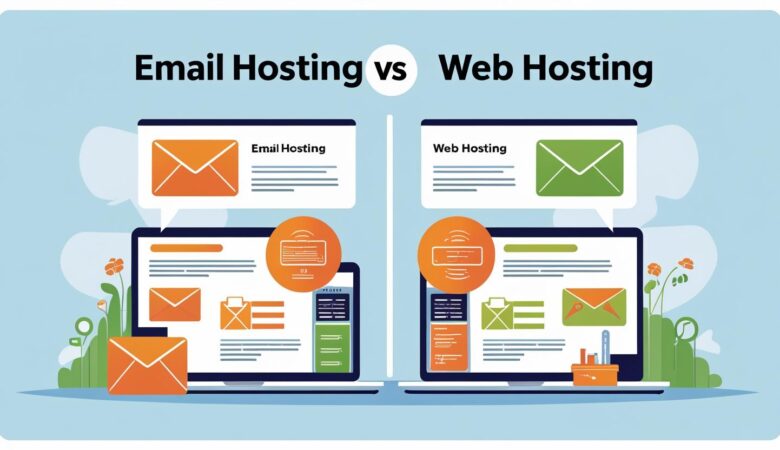
Email Hosting vs Web Hosting – What’s the Difference? 📌 Introduction Many beginners confuse email hosting with web hosting, but they serve different purposes. If you’re starting a website or business online, understanding their roles is crucial. Let’s break down the difference between the two and help you decide which one (or both) you need. 🖥️ What is Web Hosting? Definition:Web hosting is a service that allows you to store your website’s files (HTML, CSS, images, databases) on a server so visitors can access it via the internet. Key Features: Stores website data Runs CMS like WordPress Handles website traffic Supports domains & databases Examples: HiveRift, Hostinger, Bluehost 📧 What is Email Hosting? Definition:Email hosting is a service that manages your email servers, allowing you to send and receive professional emails using your domain name (e.g., yourname@yourdomain.com). Key Features: Custom domain email addresses Spam & virus protection Large inbox space Business email tools (calendars, contacts, etc.) Examples: Zoho Mail, Google Workspace, ProtonMail, Namecheap Email Hosting ⚖️ Key Differences: Email Hosting vs Web Hosting Feature Web Hosting Email Hosting Purpose Hosts website files Manages email accounts Main Use Show website on the internet Send/receive domain emails Storage Web files, databases Emails, attachments Protocols HTTP, FTP, MySQL IMAP, POP3, SMTP Add-ons Website builders, CMS Spam filters, Calendars, Aliases 🧾 Do You Need Both? Yes — if you want both a website and professional email, you need both types of hosting.Some providers (like HiveRift or Hostinger) offer bundled web + email hosting, while others keep them separate. 🧠 Which One Should You Choose? Choose web hosting if you’re launching a website. Choose email hosting if you want a custom business email (like support@yourcompany.com). Choose both if you’re building a brand online. ✅ Conclusion Web hosting and email hosting serve different but essential roles. Understanding their difference helps you build a secure, professional online presence. Choose smart, and get the right hosting for your needs.

Build Your Website with HiveRift

From professional business to enterprise, we’ve got you covered!

©2025, Hosting. All Rights Reserved by KhatuShyam Technologies

HiveRift
Privacy Overview

This website uses cookies so that we can provide you with the best user experience possible. Cookie information is stored in your browser and performs functions such as recognising you when you return to our website and helping our team to understand which sections of the website you find most interesting and useful.