How to Manage WordPress Cache Files Using cPanel

How to Manage WordPress Cache Files Using cPanel
May 26, 2025

How to Manage WordPress Cache Files Using cPanel Improve your website’s performance and fix update-related issues by learning how to access, delete, and manage cache files through cPanel.   What is WordPress Cache? WordPress cache temporarily stores static versions of your site’s content such as pages, images, and scripts to reduce server load and speed up loading times for users. However, outdated or corrupted cache can cause display issues or prevent updates from showing properly. Why Clear Cache Using cPanel? Resolve layout or CSS issues Fix plugin or theme update problems Speed up website performance Ensure latest content is being served Step 1: Log into Your cPanel Account Visit Hiverift.com and log into your client area. Click on “My Services” and select your hosting plan. Click “Login to cPanel” to access your hosting control panel. Step 2: Open the File Manager Scroll down to the “Files” section and click on File Manager. Navigate to /public_html or the root directory of your WordPress installation. Step 3: Locate Cache Folders Common cache directories and files to look for: /wp-content/cache/ /wp-content/uploads/cache/ /wp-content/w3tc/ (for W3 Total Cache plugin) /wp-content/wp-cache-config.php Step 4: Delete Cache Files Right-click on the cache folder (e.g., /cache) and choose Delete. Select “Skip the trash and permanently delete the files” (optional). Repeat this for other cache-related folders. Note: Do not delete the entire /wp-content/ folder — only cache directories inside it. Step 5: Clear Plugin-Based Cache (Optional) If you use a caching plugin like W3 Total Cache, WP Super Cache, or LiteSpeed Cache: Log into your WordPress dashboard. Go to the plugin’s settings area. Click the “Clear Cache” or “Purge All” button. Step 6: Enable Automatic Cache Clearing (Optional) Some caching plugins offer auto-clear features when content is updated. Ensure this is enabled in plugin settings to prevent future display issues. Troubleshooting Tips If cache doesn’t clear, check folder/file permissions in cPanel File Manager. Use incognito mode to confirm changes reflect on the front end. Consider restarting caching plugins or re-installing if issues persist.   By regularly managing WordPress cache files using cPanel, you ensure optimal website performance, security, and functionality. Need help? Contact Hiverift Support.
How to Monitor Website Logs Using cPanel to Debug WordPress Issues
May 26, 2025

How to Monitor Website Logs Using cPanel to Debug WordPress Issues Use your cPanel account to access and monitor website logs that help you detect and resolve common WordPress errors, plugin issues, and performance problems.   Why Monitoring Logs Is Important Website logs provide real-time insights into how your WordPress site functions, highlighting errors, access patterns, and suspicious activity. Monitoring logs can help you: Identify broken plugins or themes Track failed login attempts or brute force attacks Debug internal server errors (500 errors) Find missing file paths (404 errors) Step 1: Log in to Your cPanel Go to https://hiverift.com and log in to your client area. Navigate to My Services and choose your hosting plan. Click Login to cPanel to access your dashboard. Step 2: Locate the Logs Section In the cPanel dashboard, scroll down to the section titled Metrics or Logs. Key tools include: Error Logs – View recent errors for your website. Raw Access – Download and view raw access logs. Awstats / Webalizer – Analyze traffic and visitor behavior. Step 3: Use the Error Logs Tool Click on Error Logs. Review the log for recent PHP errors, 404 issues, or script problems. Each entry includes the file path, timestamp, and specific error code/message. Example: [Mon May 27 12:45:01 2025] [error] [client 192.168.1.1] File does not exist: /home/username/public_html/wp-content/themes/old-theme Step 4: Access and Analyze Raw Logs Click on Raw Access. Download the log file for your domain. Open it in a text editor or log analyzer tool. Look for unusual requests, frequent 404 errors, or IPs attempting unauthorized access. Step 5: Use Third-Party Debugging Tools Consider installing WordPress plugins like: Query Monitor – for debugging database queries and hooks WP Debug Log – for enabling WP_DEBUG_LOG and viewing logs in wp-content These tools supplement your cPanel logs with WordPress-specific debugging information. Tips for Debugging Common WordPress Issues Use define(‘WP_DEBUG’, true); in wp-config.php to enable debug mode. Check the log when you see a blank screen or 500 error. Track repeated requests to the same broken URL — this may indicate a plugin/theme problem. Delete or rename error-causing themes or plugins via File Manager if you lose dashboard access.   Monitoring website logs through cPanel is an essential practice for keeping your WordPress site secure and bug-free. If you’re hosted with Hiverift and need help interpreting logs, feel free to contact our support team.

How to Manage WordPress Cron Jobs via cPanel
May 26, 2025

How to Manage WordPress Cron Jobs via cPanel Want to optimize WordPress scheduled tasks? Learn how to manage and configure real cron jobs via cPanel to improve site performance and reliability. What Are WordPress Cron Jobs? WordPress uses a file called wp-cron.php to handle scheduled tasks such as: Publishing scheduled posts Checking for theme/plugin updates Running backup plugins Sending email notifications By default, WordPress runs these tasks when someone visits your site. This isn’t reliable for high-traffic or low-traffic websites. Step 1: Disable Default WordPress Cron To avoid relying on visitor-triggered cron jobs, disable WordPress’ internal cron: Login to your cPanel via Hiverift. Open the File Manager. Navigate to your WordPress root directory (usually public_html). Edit the wp-config.php file. Add the following line before /* That’s all, stop editing! */: define(‘DISABLE_WP_CRON’, true); Step 2: Set Up a Real Cron Job via cPanel From the cPanel dashboard, go to Cron Jobs under the “Advanced” section. Scroll to “Add New Cron Job”. Set the time interval. For example: */15 * * * * = every 15 minutes 0 * * * * = hourly In the command box, enter: cd /home/yourusername/public_html; php -q wp-cron.php Note: Replace yourusername with your actual cPanel username. Step 3: Monitor and Troubleshoot Cron Jobs Check your email notifications for cron job output or errors. You can direct output to a file to monitor: cd /home/yourusername/public_html; php -q wp-cron.php >> cron.log 2>&1 Use plugins like WP Crontrol to see all registered WordPress cron events. Tips for Managing WordPress Cron Jobs Keep the frequency realistic — don’t overload your server with too many cron jobs. Backup your site before modifying core files. Clear stale cron jobs with WP Crontrol if you face issues with missed tasks.   Managing WordPress cron jobs via cPanel gives you full control over how and when scheduled tasks run, helping boost your site’s reliability and performance.Need help? Contact Hiverift Support for personalized assistance.

How to Enable Automatic WordPress Backups via cPanel
May 26, 2025

How to Enable Automatic WordPress Backups via cPanel Protecting your website from data loss is essential. In this guide, we’ll show you how to schedule automatic WordPress backups using cPanel tools like JetBackup or Softaculous. Why Automatic Backups Are Important Prevents data loss from malware, server issues, or human error Makes it easy to restore your site to a previous working state Essential before updates or major changes to themes/plugins Method 1: Use JetBackup for Automatic Backups Login to your cPanel account provided by Hiverift. Locate and click on the JetBackup section. Select Backup Jobs or Full Backups. Choose your backup schedule (daily, weekly, or monthly). Set the number of backups you want to retain. Save the settings to start automatic backups. Note: JetBackup availability depends on your hosting plan. Method 2: Enable Auto Backups via Softaculous In cPanel, go to Softaculous Apps Installer. Click on WordPress > Installations. Click the Edit icon next to your WordPress site. Scroll to Automated Backups and select a schedule (e.g., daily or weekly). Set backup rotation (how many backups to keep). Save changes to enable auto backups. Alternative: WordPress Backup Plugins If your hosting plan doesn’t support JetBackup or Softaculous, you can use plugins: UpdraftPlus – Backup to Dropbox, Google Drive, etc. BackupBuddy – Scheduled backups and easy site migrations BackWPup – Automate backup jobs and store on cloud Install from the WordPress dashboard and configure automatic scheduling. Restoring Your WordPress Site Use JetBackup > Restore to roll back your website to a chosen backup. Or use Softaculous > Installations > Restore option for your site. Follow on-screen instructions to complete the restoration. Tips for Managing WordPress Backups Keep offsite copies (Google Drive, Dropbox, etc.) for extra safety. Monitor email notifications to know when backups succeed or fail. Always perform a manual backup before major updates.   By following the steps above, your WordPress website hosted on Hiverift will remain secure and backed up regularly. For help, contact Hiverift Support.  

How to Enable Automatic WordPress Backups via cPanel
May 26, 2025

How to Enable Automatic WordPress Backups via cPanel Setting up automatic backups for your WordPress website is essential for data security and peace of mind. In this guide, you’ll learn how to enable and configure automatic backups using cPanel tools like JetBackup or Softaculous. Why Enable Automatic Backups? Prevents data loss from hacks, server crashes, or accidental deletion. Makes it easy to restore your site to a previous working state. Essential for WordPress updates and plugin/theme changes. Option 1: Use JetBackup (If Available in Your cPanel) Log in to your cPanel account. Scroll down to the JetBackup section. Click on Full Backups or Backup Jobs. Set up your backup schedule (daily, weekly, monthly) based on your needs. Choose backup retention (how many backups you want to keep). Enable automatic backups and save the configuration. Note: JetBackup settings may vary slightly depending on your hosting provider. Option 2: Enable Automatic Backups via Softaculous When you install WordPress using Softaculous, you can set up auto backups: Log in to cPanel. Go to Softaculous Apps Installer and click on WordPress. Under “Current Installations,” find your site and click the pencil icon (Edit). Scroll to the “Backup Location” and “Automated Backups” settings. Set backups to occur daily, weekly, or monthly. Choose the number of backup copies to retain (usually 2–4). Save changes. Option 3: Use WordPress Backup Plugins (Bonus Tip) If your host does not provide automatic backup tools, you can install a plugin: UpdraftPlus – Schedule cloud backups (Google Drive, Dropbox, etc.) BackupBuddy – Full backups with email notifications BlogVault – Real-time backups and easy restores Install the plugin from the WordPress dashboard and configure automatic schedules. How to Restore from a Backup (Optional Step) If you need to restore your website: Use JetBackup > Restore option to revert to a selected backup. Or use Softaculous > WordPress > Restore icon next to your installation. Confirm restore and wait until it completes. Best Practices Always keep at least one recent backup stored offsite (Google Drive, Dropbox, etc.). Test the restore function after major changes to ensure backups work properly. Set automated emails to notify you when backups complete or fail. By enabling automatic WordPress backups using cPanel tools like JetBackup or Softaculous, you safeguard your website’s data and gain confidence to manage your site fearlessly. If you’re hosting with Hiverift, our support team is here to assist 24/7.

How to Clean a Hacked WordPress Site Using cPanel
May 26, 2025

How to Clean a Hacked WordPress Site Using cPanel Discover how to recover and clean your hacked WordPress website using the tools available in your cPanel dashboard. Follow this step-by-step guide to remove malware, repair your site, and secure it against future attacks. Signs Your WordPress Site May Be Hacked Website is redirected to unknown pages Unwanted popups or ads Google marks your site as “Not Secure” or “This site may be hacked” Unfamiliar users or files in your installation Slow performance or unexpected traffic Step 1: Backup Your Website Immediately Before making any changes, create a full backup of your website via cPanel: Log in to cPanel. Go to Files > Backup. Click Download a Full Website Backup and store it securely on your computer. Step 2: Scan Files Using Malware Scanner (if available) Some hosts (like Hiverift) include malware scanning tools: Log in to cPanel. Navigate to Virus Scanner or ImunifyAV under Security. Run a full scan on your public_html directory. Quarantine or delete infected files as suggested. Step 3: Manually Review and Delete Suspicious Files Go to File Manager in cPanel. Navigate to public_html or your WordPress folder. Look for unfamiliar PHP files in root, wp-content, uploads, and themes/plugins. Delete any suspicious files, but do so carefully if you’re unsure. Cross-reference with a fresh WordPress installation if needed. Step 4: Reinstall WordPress Core Files To ensure no core file is compromised: Download a clean copy of WordPress from wordpress.org. Extract the files locally. Upload all folders and files (except wp-content) using File Manager or FTP to overwrite the hacked ones. Step 5: Reset All Passwords Reset the following credentials immediately: WordPress Admin Users cPanel & Hosting Account MySQL Database Password (can be changed via cPanel > MySQL Databases) FTP accounts Step 6: Check and Clean Database via phpMyAdmin In cPanel, open phpMyAdmin. Select your WordPress database. Review tables like wp_users, wp_options, and wp_posts for strange content, base64 code, or unauthorized admin users. Delete malicious entries or restore from a known-clean backup. Step 7: Install a Security Plugin Once the site is clean, log in to your WordPress admin and install one of these plugins: Wordfence Security iThemes Security MalCare Security Run a fresh scan and activate firewall features. Step 8: Submit Your Site for Google Review If your site was blacklisted by Google or shows malware warnings: Sign in to Google Search Console. Select your property and go to Security Issues. Request a review once you confirm the hack has been cleaned. Prevent Future Hacks Keep WordPress, plugins, and themes up to date Use strong passwords and two-factor authentication Install a reliable security plugin Backup your website regularly using cPanel or plugins Use trusted themes/plugins only Cleaning a hacked WordPress site can be stressful, but with cPanel access and this guide, you can remove malware and restore your site to a secure state. If you’re hosted with Hiverift, our support team is also available to assist you 24/7.

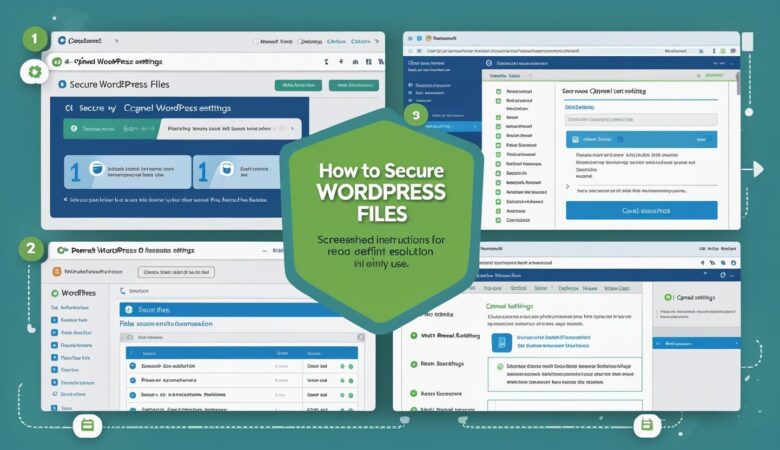
How to Secure WordPress Files Using cPanel Settings
May 26, 2025

How to Secure WordPress Files Using cPanel Settings Keeping your WordPress files secure is essential to protect your website from hackers, malware, and unauthorized access. In this guide, we’ll show you how to use cPanel tools to lock down your WordPress files and improve your site’s overall security. Why File Security Matters in WordPress WordPress websites are frequent targets for cyberattacks. By securing core files such as wp-config.php and directories like wp-content, you reduce the risk of data breaches, defacement, or site takeover. Step 1: Log In to Your cPanel Account Access your cPanel dashboard by visiting https://yourdomain.com/cpanel and logging in with your hosting credentials. Step 2: Use File Manager to Set Correct File Permissions Navigate to File Manager under the Files section. Go to the root directory of your WordPress installation (usually public_html). Right-click important files like wp-config.php and select Permissions. Set file permissions as follows: wp-config.php – 400 or 440 Other PHP files – 644 Folders – 755 Click Change Permissions. Step 3: Protect wp-config.php Using .htaccess This file contains your database credentials and must be kept secure. You can restrict access via .htaccess: In File Manager, open the public_html folder. Find and edit the .htaccess file. If it’s not visible, enable “Show Hidden Files”. Add the following code at the bottom of the file: # Protect wp-config.php <files wp-config.php> order allow,deny deny from all </files> Save and close the file. Step 4: Disable Directory Browsing Prevent visitors from browsing your website directories by adding this line to your .htaccess file: Options -Indexes Step 5: Password-Protect wp-admin Directory Add an extra layer of security to your admin area: In cPanel, go to Directory Privacy (or Password Protect Directories). Navigate to /public_html/wp-admin. Click Edit, then check “Password protect this directory.” Set a name and create a username and password. Step 6: Disable PHP Execution in wp-content/uploads Hackers often target this directory to upload malicious PHP files. To prevent this: In File Manager, go to /wp-content/uploads. Click + File to create a new file named .htaccess. Add the following code: <Files *.php> deny from all </Files> Save and close the file. Step 7: Monitor and Update Regularly Keep WordPress, plugins, and themes up to date. Use security plugins like Wordfence or iThemes Security. Regularly scan your site for malware using cPanel’s tools or external scanners. Securing your WordPress files via cPanel is a critical step in keeping your website safe from threats. With a few configuration changes and good maintenance habits, you can significantly reduce the risk of attacks.

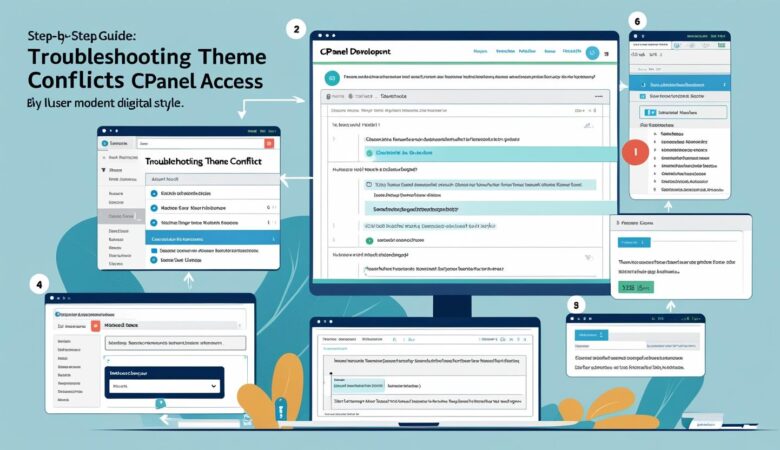
How to Troubleshoot Theme Conflicts Using cPanel Access
May 25, 2025

  How to Troubleshoot Theme Conflicts Using cPanel Access Theme conflicts in WordPress can cause display issues, errors, or site crashes. If you cannot access your WordPress dashboard, cPanel offers powerful tools to diagnose and fix these problems. This detailed guide shows you how to troubleshoot theme conflicts using cPanel. What Is a Theme Conflict? A theme conflict occurs when your active WordPress theme conflicts with plugins, WordPress core, or server settings. This can result in broken layouts, white screens, or error messages. When to Use cPanel for Troubleshooting If your WordPress dashboard is inaccessible due to a theme issue, cPanel gives you file-level control to disable the theme or plugins and fix the problem without needing WordPress admin access. Step 1: Log in to cPanel Access your hosting control panel by navigating to https://yourdomain.com/cpanel and entering your username and password. Step 2: Open File Manager From the cPanel dashboard, click on File Manager under the Files section to manage your website files. Step 3: Navigate to Your WordPress Themes Folder Locate your active theme folder at: public_html/wp-content/themes/active-theme-folder Note: Replace active-theme-folder with the folder name of your currently active theme. Step 4: Disable the Active Theme To disable the active theme and force WordPress to revert to a default theme (like Twenty Twenty-Three), rename the active theme folder: Right-click the theme folder and select Rename. Add -disabled or another suffix to the folder name, e.g., mytheme-disabled. WordPress will automatically activate a default theme if the current one is missing. Step 5: Check Your Website Visit your website to see if the issue is resolved. If the site loads correctly, the problem was with the theme. Step 6: Troubleshoot Plugins (Optional) If disabling the theme doesn’t fix the issue, plugins might be causing conflicts: Navigate to the plugins folder at public_html/wp-content/plugins/. Rename the plugins folder to something like plugins-disabled to deactivate all plugins. Check your site again. If resolved, rename the folder back to plugins and deactivate plugins one-by-one from the dashboard to find the culprit. Step 7: Restore the Theme Folder Name Once you’ve identified and fixed the problem, rename your theme folder back to its original name to reactivate it. Additional Tips Backup before changes: Always create a backup of your site before renaming folders or editing files. Check error logs: Review server error logs via cPanel for clues. Contact support: Reach out to your hosting or theme support if problems persist. Using cPanel to troubleshoot theme conflicts empowers you to fix WordPress issues even without dashboard access. Follow these steps carefully to restore your website’s functionality.

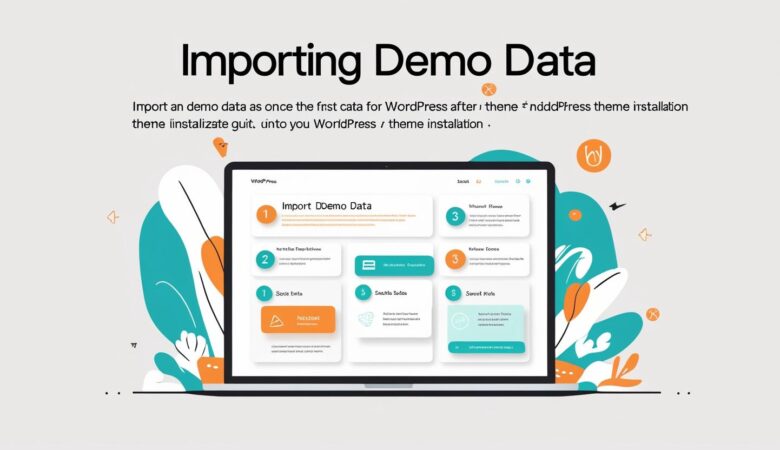
How to Import Demo Data into WordPress After Theme Installation
May 25, 2025

How to Import Demo Data into WordPress After Theme Installation Importing demo data after installing a WordPress theme helps you quickly set up your website with pre-built layouts, pages, posts, menus, and settings. This detailed guide walks you through the process step-by-step. What Is Demo Data? Demo data typically includes sample pages, posts, images, menus, widgets, and theme settings that showcase how a theme looks and functions. Importing it allows you to start customizing a site that already has a structure and design in place. Step 1: Install and Activate Your WordPress Theme Before importing demo data, make sure your desired WordPress theme is installed and activated: Log in to your WordPress dashboard. Navigate to Appearance > Themes. Click Add New and upload your theme zip file or choose a theme from the repository. Activate the theme. Step 2: Locate the Demo Import Feature Most premium themes come with an integrated demo import tool or recommend a plugin for importing demo data. Common ways to find this option include: A dedicated Demo Import or One-Click Import menu item in the WordPress dashboard (often under Appearance or a theme-specific menu). A plugin recommended by the theme, such as One Click Demo Import or Theme Demo Importer. Instructions in the theme documentation or support site. Step 3: Install Required Plugins (If Any) Some themes require specific plugins to properly import demo content. You may see a notification to install these after activating the theme. Follow these steps: Install and activate the recommended plugins. Make sure the plugins are active before proceeding. Step 4: Import the Demo Data Once everything is set: Go to the demo import page in your dashboard (e.g., Appearance > Import Demo Data). Choose the demo version or layout you want to import, if multiple options are available. Click Import or Start Import. Wait for the process to complete — this may take several minutes depending on the size of the demo. Important: Do not close or navigate away from the page while the import is in progress. Step 5: Configure Your Site After Import After the demo content imports: Go to Appearance > Menus and assign the imported menus to their locations (e.g., primary menu, footer menu). Check Settings > Reading to verify the homepage and blog pages are set correctly. Customize widgets via Appearance > Widgets if needed. Adjust theme settings and customize your site under Appearance > Customize. Tips for a Smooth Demo Import Backup your site: If importing to an existing site, backup your current content as demo import may overwrite it. Use a clean install: Demo data works best on a fresh WordPress install. Check PHP limits: Some imports require higher PHP memory and execution time limits. Contact your hosting if needed. Consult theme docs: Always refer to your theme’s official documentation for specific instructions. Importing demo data is an excellent way to jumpstart your WordPress website design and layout. After importing, you can easily customize content to make the site truly your own.

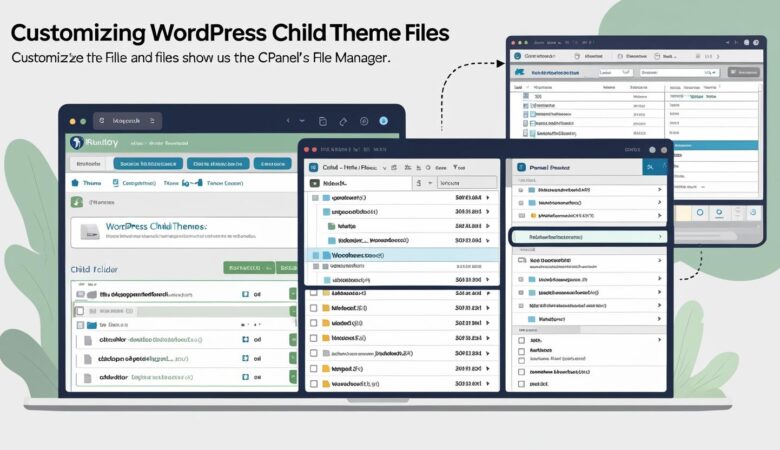
How to Customize Your WordPress Child Theme Files Using cPanel File Manager
May 25, 2025

  How to Customize Your WordPress Child Theme Files Using cPanel File Manager Customizing your WordPress child theme lets you safely modify your site’s appearance and functionality without affecting the parent theme. This guide walks you through editing child theme files using cPanel’s File Manager. Why Customize a Child Theme? A child theme inherits everything from the parent theme but allows you to safely add or override styles, templates, and PHP functions. Editing the child theme ensures your changes won’t be lost during parent theme updates. Step 1: Log in to cPanel Access your cPanel by navigating to https://yourdomain.com/cpanel and entering your username and password. Step 2: Open File Manager From the cPanel dashboard, locate and click on File Manager under the Files section. Step 3: Navigate to Your Child Theme Directory In File Manager, browse to the WordPress themes folder: public_html/wp-content/themes/your-child-theme/ Replace your-child-theme with the actual name of your child theme folder. Step 4: Edit the Stylesheet (style.css) Your child theme’s style.css controls the appearance. To make design changes: Right-click style.css and select Edit. Modify or add CSS rules to customize fonts, colors, layouts, etc. Save your changes. Example: To change the site background color, add: body { background-color: #f0f0f0; } Step 5: Modify Template Files You can override parent theme templates by copying the file into your child theme folder and editing it: Find the template file in the parent theme folder (e.g., header.php or footer.php). Copy that file into your child theme folder. Edit it as needed via File Manager. Note: Be cautious editing PHP files. Backup before making changes. Step 6: Customize functions.php Add custom PHP functions to your child theme’s functions.php: Right-click functions.php and choose Edit. Add your custom code snippets to extend functionality. Save the file and check your site for errors. Example: Add this to disable WordPress emoji scripts: <?php remove_action(‘wp_head’, ‘print_emoji_detection_script’, 7); remove_action(‘wp_print_styles’, ‘print_emoji_styles’); ?> Step 7: Test Your Changes After saving edits, visit your website to verify the changes appear correctly. If there’s an error, revert the changes or restore from a backup. Best Practices for Child Theme Customization Backup: Always backup files before editing. Use a staging site: Test changes on a development or staging environment. Comment your code: Add comments for clarity. Keep it minimal: Only override what you need to reduce complexity. By customizing your WordPress child theme via cPanel File Manager, you maintain a safe and organized workflow for site development. For more help, contact your hosting support or consult WordPress documentation.

Build Your Website with HiveRift

From professional business to enterprise, we’ve got you covered!

©2025, Hosting. All Rights Reserved by KhatuShyam Technologies

HiveRift
Privacy Overview

This website uses cookies so that we can provide you with the best user experience possible. Cookie information is stored in your browser and performs functions such as recognising you when you return to our website and helping our team to understand which sections of the website you find most interesting and useful.