WebSocket Integration in Node.js Apps on cPanel-Based Hosting

WebSocket Integration in Node.js Apps on cPanel-Based Hosting
May 26, 2025

WebSocket Integration in Node.js Apps on cPanel-Based Hosting How to enable real-time WebSocket communication in your Node.js apps hosted on cPanel environments Introduction WebSockets enable persistent, bi-directional communication between clients and servers, essential for real-time applications like chat, notifications, or live updates. Integrating WebSockets with Node.js on cPanel hosting requires some special steps due to proxy servers and shared hosting limitations. Prerequisites Active cPanel hosting plan with Node.js support Basic knowledge of Node.js and WebSocket concepts Access to cPanel dashboard and File Manager or SSH access Step 1: Create a Simple WebSocket Server with Node.js Here is a basic example using the popular ws WebSocket library: const WebSocket = require(‘ws’); const server = new WebSocket.Server({ port: 3000 }); server.on(‘connection’, (socket) => { console.log(‘Client connected’); socket.on(‘message’, (message) => { console.log(‘Received: ‘ + message); // Broadcast message to all connected clients server.clients.forEach(client => { if (client !== socket && client.readyState === WebSocket.OPEN) { client.send(message); } }); }); socket.on(‘close’, () => { console.log(‘Client disconnected’); }); }); console.log(‘WebSocket server running on port 3000’); Step 2: Upload Your Node.js App Upload your application files (including package.json and your server script) to your hosting account using cPanelโ€™s File Manager or FTP. Step 3: Install Dependencies If SSH is available, navigate to your app directory and run: npm install ws If not, install dependencies locally and upload the node_modules folder. Step 4: Configure Node.js Application in cPanel Log in to your cPanel dashboard. Navigate to Setup Node.js App. Create a new application or select the existing one. Set the Application Root directory and Startup File (e.g., server.js). Choose the appropriate Node.js version. Save and start the application. Step 5: Enable WebSocket Proxying with .htaccess Since cPanel hosting uses Apache as a proxy, you need to configure your .htaccess file to support WebSocket connections: RewriteEngine On RewriteCond %{HTTP:Upgrade} =websocket [NC] RewriteRule /(.*) ws://localhost:3000/$1 [P,L] RewriteCond %{HTTP:Upgrade} !=websocket [NC] RewriteRule /(.*) http://localhost:3000/$1 [P,L] Replace 3000 with your Node.js appโ€™s port if different. Step 6: Test Your WebSocket Server Open your app URL and connect clients to test WebSocket functionality. Use browser console or tools like WebSocket Echo Test to validate the connection. Tip: If you encounter connection issues, check error logs in cPanel and ensure ports are open and proxy settings are correct. Troubleshooting & Best Practices Ensure no firewall blocks your WebSocket port. Use environment variables to configure ports and other sensitive data. Consider using socket.io if you need fallback options for older browsers. Keep your Node.js app running by restarting via cPanel or using process managers if supported. Additional Resources ws GitHub Repository Node.js Official Docs cPanel Documentation Need Assistance? Contact dev@hiverift.com for expert help deploying WebSocket-enabled Node.js apps on cPanel hosting. ยฉ 2025 Hiverift. All rights reserved.
Connecting External APIs in Node.js Apps Using cPanel Server
May 26, 2025

Connecting External APIs in Node.js Apps Using cPanel Server Integrating external APIs into your Node.js applications adds powerful functionality, such as payment gateways, social media data, weather information, and more. When hosting your Node.js app on a cPanel server, connecting these APIs is straightforward with the right setup. Why Use External APIs in Node.js? External APIs enable your app to access data and services beyond its own capabilities. This can: Extend features without building from scratch Improve user experience with dynamic content Integrate third-party services like authentication, messaging, and payments Prerequisites Active cPanel hosting with Node.js application set up SSH access to your hosting server (optional but recommended) API key or credentials for the external API service Basic knowledge of Node.js and npm Step 1: Prepare Your Node.js Environment on cPanel Login to cPanel and open the Node.js Application Manager. Create or select your Node.js application. Ensure your appโ€™s root directory and startup file (e.g., app.js) are correctly configured. Open SSH terminal (if available) or use cPanelโ€™s File Manager and Terminal to manage files and install packages. Step 2: Install HTTP Request Libraries To interact with external APIs, you need HTTP client libraries. Popular choices include axios and node-fetch. Install one via SSH or cPanel Terminal: npm install axios npm install node-fetch Step 3: Write Code to Connect External API Here is an example of using axios to fetch data from a public API (JSONPlaceholder): const axios = require(‘axios’); async function fetchPosts() { try { const response = await axios.get(‘https://jsonplaceholder.typicode.com/posts’); console.log(‘Posts:’, response.data); } catch (error) { console.error(‘Error fetching posts:’, error); } } fetchPosts(); Replace the URL and headers as needed for your external API, including API keys if required: const response = await axios.get(‘https://api.example.com/data’, { headers: { ‘Authorization’: ‘Bearer YOUR_API_KEY’ } }); Step 4: Set Environment Variables Securely Store sensitive credentials like API keys in environment variables to keep them secure: In cPanel Node.js Manager, set environment variables under your app configuration. Or use an .env file with dotenv package: npm install dotenv // In your app.js require(‘dotenv’).config(); const apiKey = process.env.API_KEY; Step 5: Restart Your Node.js Application After adding your API integration code and environment variables, restart your app via the cPanel Node.js Application Manager or SSH: pm2 restart your-app-name npm restart Troubleshooting Tips Check cPanel error logs and Node.js app logs for connection issues. Verify your server can access external API URLs (firewall or network restrictions may apply). Ensure API keys and credentials are valid and correctly set. Test API calls locally before deploying to server. Conclusion Connecting external APIs in your Node.js apps hosted on a cPanel server unlocks vast possibilities for enhancing functionality and user engagement. By carefully setting up your environment, installing necessary libraries, and securely managing credentials, you can smoothly integrate third-party services and build powerful applications. ยฉ 2025 Hiverift Hosting | Node.js External API Integration Guide  

Configure Real-Time Socket.io Applications on cPanel Hosting
May 26, 2025

Configure Real-Time Socket.io Applications on cPanel Hosting Step-by-step guide to deploy and manage Socket.io-based real-time apps on cPanel hosting. Introduction Socket.io is a popular JavaScript library that enables real-time, bi-directional communication between clients and servers. Hosting real-time applications using Socket.io on cPanel requires special considerations due to shared hosting environments and limitations. Prerequisites Active cPanel hosting with Node.js support (e.g., Hiverift or similar providers) Basic understanding of Node.js and Socket.io Access to cPanel dashboard and File Manager or SSH access Step 1: Setup Your Node.js Application with Socket.io Create or update your Node.js app to include Socket.io. Here’s a simple example: const express = require(‘express’); const http = require(‘http’); const socketIo = require(‘socket.io’); const app = express(); const server = http.createServer(app); const io = socketIo(server); io.on(‘connection’, (socket) => { console.log(‘New client connected: ‘ + socket.id); socket.on(‘message’, (msg) => { console.log(‘Message received: ‘, msg); io.emit(‘message’, msg); // Broadcast to all clients }); socket.on(‘disconnect’, () => { console.log(‘Client disconnected: ‘ + socket.id); }); }); const PORT = process.env.PORT || 3000; server.listen(PORT, () => { console.log(`Server listening on port ${PORT}`); }); Step 2: Upload Your Application Files Use cPanelโ€™s File Manager or FTP to upload your Node.js app files (including package.json, server.js, etc.) to a directory within your home folder. Step 3: Install Dependencies If your hosting allows SSH access, connect via SSH and run: npm install If SSH is unavailable, upload the node_modules folder from your local machine after running npm install. Step 4: Configure Node.js Application in cPanel Log in to cPanel dashboard. Navigate to Setup Node.js App. Create a new application or select your existing one. Set the Application Root to your app directory. Set the Application Startup File to your main file (e.g., server.js). Select the Node.js version supported by your app. Click Create or Update. Step 5: Handle WebSocket Connections Behind Proxy cPanel hosting typically uses Apache or NGINX as a proxy server. You must ensure WebSocket upgrade headers are properly forwarded. If you have access to your domain’s .htaccess file, add the following to enable WebSocket proxying: RewriteEngine On RewriteCond %{HTTP:Upgrade} =websocket [NC] RewriteRule /(.*) ws://localhost:3000/$1 [P,L] RewriteCond %{HTTP:Upgrade} !=websocket [NC] RewriteRule /(.*) http://localhost:3000/$1 [P,L] Note: Replace 3000 with your actual Node.js port if different. Step 6: Restart Your Application Use the Setup Node.js App interface in cPanel to restart your application so changes take effect. Step 7: Test Your Real-Time Application Open your application URL in multiple browsers or devices and test real-time features (e.g., chat messages) to verify Socket.io is working correctly. Tip: Use browser developer tools (Console and Network tabs) to debug WebSocket connections and check for errors. Troubleshooting Connection Issues: Verify WebSocket support and proxy rules in .htaccess. Port Conflicts: Ensure no other app is using the same port as your Node.js app. Resource Limits: Some shared hosting environments have limits on concurrent connections or long-running processes. Consider upgrading to VPS if needed. Additional Resources Socket.io Official Documentation Node.js Documentation cPanel Documentation Need Support? Contact Hiveriftโ€™s development support team at dev@hiverift.com for assistance deploying Socket.io apps on cPanel hosting. ยฉ 2025 Hiverift. All rights reserved.
Boost Node.js Performance on Shared Hosting with cPanel
May 26, 2025

Boost Node.js Performance on Shared Hosting with cPanel Running Node.js applications on shared hosting can present performance challenges due to limited resources and shared environment constraints. However, with proper optimization techniques and leveraging cPanel features, you can significantly boost your Node.js appโ€™s performance. Why Performance Optimization Matters on Shared Hosting Shared hosting environments allocate resources like CPU, memory, and bandwidth among multiple users. Node.js apps that are not optimized can consume excessive resources, leading to slow response times, downtime, or even suspension by your hosting provider. Optimizing your app ensures faster load times, better user experience, and more efficient use of resources. Top Tips to Boost Node.js Performance on Shared Hosting with cPanel 1. Use the Latest Stable Node.js Version Always use the latest LTS (Long Term Support) version of Node.js available on your hosting. Newer versions include performance improvements and security patches. 2. Enable Caching Implement caching mechanisms like: In-memory caches (e.g., node-cache, Redis if available) HTTP caching headers for static assets Use CDN (Content Delivery Network) for serving static files 3. Optimize Your Code and Dependencies Review your application code for inefficiencies: Minimize synchronous blocking operations Use asynchronous programming properly Keep dependencies up-to-date and remove unused packages Use lightweight libraries where possible 4. Use PM2 Process Manager PM2 helps keep your app running smoothly with features like automatic restarts, load balancing, and monitoring. Install PM2 via SSH and run your app with: pm2 start app.js –name “your-app-name” 5. Configure Reverse Proxy with NGINX Use NGINX as a reverse proxy to handle client requests efficiently and improve scalability. NGINX can serve static files and route dynamic requests to your Node.js app, reducing load on your application. 6. Optimize Database Queries Ensure your database queries are efficient and indexed properly. Use connection pooling and avoid unnecessary database calls to reduce latency. 7. Monitor Resource Usage Regularly monitor CPU, memory, and disk usage via cPanelโ€™s resource monitoring tools or SSH. Adjust your app or upgrade your hosting plan if limits are consistently reached. 8. Compress Responses Enable gzip compression in your Node.js app or via NGINX to reduce response sizes and speed up data transfer. 9. Limit Concurrent Connections Implement throttling or rate limiting to prevent abuse and excessive resource consumption by limiting the number of requests from a single user. Bonus: Using cPanelโ€™s Node.js Application Manager cPanel provides a built-in Node.js Application Manager that simplifies deployment and management of Node.js apps. You can: Select Node.js version Manage environment variables Start, stop, or restart apps Configure app root and startup file Using this tool correctly can improve app stability and performance. Conclusion Although shared hosting environments come with limitations, applying these best practices will help you optimize your Node.js app for better performance and reliability. Efficient resource use and smart configuration with cPanel will ensure your application delivers a smooth user experience even on shared servers. ยฉ 2025 Hiverift Hosting | Node.js Performance Optimization

View and Manage Node.js Logs from cPanel File Manager
May 26, 2025

View and Manage Node.js Logs from cPanel File Manager Monitor, troubleshoot, and manage your Node.js application logs easily through cPanelโ€™s File Manager. Why Monitor Node.js Logs? Logs provide valuable insights into your applicationโ€™s performance, errors, and user activity. Regularly checking your logs helps you quickly identify and fix issues. Prerequisites Node.js application hosted on cPanel (Hiverift or similar) Access to your cPanel dashboard Basic familiarity with Node.js app structure Step 1: Log into cPanel Open your web browser and navigate to https://yourdomain.com/cpanel. Enter your cPanel username and password to log in. Step 2: Locate Your Node.js Application Directory In the cPanel dashboard, open File Manager. Navigate to the folder where your Node.js app files reside. This is usually inside the home/username directory or a subfolder like nodejsapp. Step 3: Find Your Log Files Node.js apps typically generate logs in these common ways: Custom Log Files: Defined in your app code using console.log() or logging libraries like winston, saved to a file like app.log or error.log. Default Error Logs: cPanel may store error logs for your app, often accessible via Errors or Raw Access Logs in cPanel. Step 4: Open and View Log Files In File Manager, locate your log files, for example, logs/app.log or logs/error.log. Select the log file and click View or Edit to open it in the built-in text editor. Review the logs for errors, warnings, or info messages. Step 5: Manage Your Logs Download: To keep a backup, right-click the log file and select Download. Clear Logs: To free up space, open the log file in edit mode, delete the contents, and save the empty file. Rotate Logs: For large apps, implement log rotation in your Node.js app or via cron jobs to archive logs periodically. Step 6: Use cPanelโ€™s Error Logs for Quick Troubleshooting Besides custom logs, you can also check: Errors Section: In cPanel, click on Errors to see recent server and app errors. Raw Access Logs: Provides detailed access logs useful for debugging traffic and request issues. Tip: Configure your Node.js app to log both to console and files for easier troubleshooting in cPanel. Example: Simple File Logging in Node.js const fs = require(‘fs’); const logStream = fs.createWriteStream(‘./logs/app.log’, { flags: ‘a’ }); function log(message) { const timestamp = new Date().toISOString(); logStream.write(`[${timestamp}] ${message}\n`); } // Usage log(‘Server started successfully’); log(‘Received a request on /api/data’); Summary Using cPanelโ€™s File Manager to view and manage your Node.js logs is a simple yet powerful way to keep your applications healthy and responsive. Regular log monitoring combined with effective log management practices ensures your app runs smoothly. For more help, contact dev@hiverift.com. ยฉ 2025 Hiverift. All rights reserved.
Automate Node.js Deployment with Git and cPanel Hooks
May 26, 2025

Automate Node.js Deployment with Git and cPanel Hooks Manual deployment of Node.js applications can be time-consuming and error-prone. Automating deployment using Git version control and cPanel deployment hooks can streamline updates, reduce downtime, and improve your development workflow. What is Deployment Automation? Deployment automation refers to the process of automatically updating your production server with new code changes pushed to your Git repository. This reduces manual intervention and ensures your Node.js app is always running the latest version. Prerequisites Active cPanel hosting account on Hiverift Node.js application already set up in cPanel Git repository (GitHub, GitLab, Bitbucket, or self-hosted) SSH access to your cPanel server Basic knowledge of Git and shell scripting Step 1: Set Up Your Git Repository in cPanel Login to your cPanel dashboard. Navigate to Git Version Control under the Files section. Click Create to clone your remote Git repository or create a new repository. Set the deployment directory where your Node.js app will reside. Clone the repository to your server. Step 2: Configure cPanel Deployment Hooks Deployment hooks are scripts triggered automatically after Git operations like pull or push. To configure them: Navigate to your repository folder in ~/.cpanel/hooks/ or create the folder if it doesn’t exist. Create a post-receive hook script named post-receive inside .git/hooks/ directory of your repository. Make sure the script is executable: chmod +x post-receive Step 3: Write the Deployment Script The deployment script automates installing dependencies, building your app, and restarting the Node.js process. Here is a sample post-receive script: #!/bin/bash # Navigate to the app directory cd /home/your-cpanel-user/path-to-your-node-app || exit # Pull latest changes (if needed) git pull origin main # Install npm dependencies npm install # Build the app if necessary (uncomment if your app requires build step) # npm run build # Restart the app using PM2 or cPanel’s Node.js app manager pm2 restart your-app-name || pm2 start app.js –name “your-app-name” Note: Adjust paths, branch names, and app names to match your environment. Step 4: Integrate Git Push with Deployment When you push changes to your remote Git repository, cPanel can automatically deploy your updates: Set up a webhook on your Git hosting service to trigger a pull on your server. Alternatively, manually SSH into your server and run git pull and the deployment script. Step 5: Testing the Automated Deployment Make a small change in your local Node.js project. Commit and push the change to the remote Git repository. Verify that the post-receive hook executes automatically. Check your app to confirm the changes are live. Troubleshooting Tips Ensure the post-receive hook has executable permissions. Check logs for errors (~/.pm2/logs/ for PM2 or cPanel error logs). Test each command in the script manually to verify it works. Confirm SSH keys are configured properly for Git authentication. Benefits of Using Git and cPanel Hooks for Deployment Faster and reliable deployment with minimal downtime Version control integration for traceability Reduced manual errors during deployment Easy rollback to previous versions if needed Conclusion Automating your Node.js deployment using Git and cPanel hooks simplifies the update process and makes managing your applications more efficient. With this setup, pushing code changes triggers an automatic deployment, freeing you to focus on building great features instead of managing servers. ยฉ 2025 Hiverift Hosting | Node.js Deployment Automation Guide

Use Cluster Mode to Scale Node.js Apps Hosted in cPanel
May 26, 2025

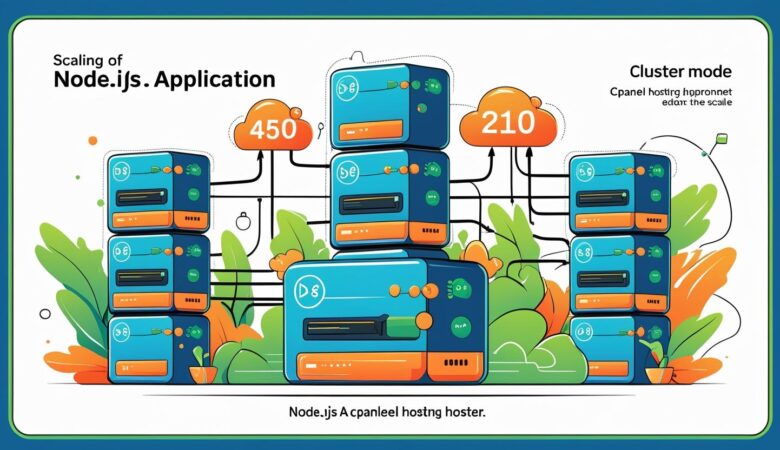
Use Cluster Mode to Scale Node.js Apps Hosted in cPanel Improve performance and reliability of your Node.js apps by leveraging Cluster Mode in cPanel. What is Cluster Mode? Cluster Mode allows Node.js applications to create multiple worker processes to handle incoming requests. This helps in maximizing CPU utilization and improving app responsiveness by running on multiple cores. Benefits of Using Cluster Mode Improved Performance: Handles more concurrent requests efficiently. Reliability: If a worker crashes, the master process can spawn a new one automatically. Better Resource Utilization: Uses all available CPU cores effectively. Prerequisites Node.js application deployed via cPanel on Hiverift or similar hosting. Access to cPanel and ability to edit Node.js app files. Step 1: Access Your Node.js Application Files Login to your cPanel account and open the File Manager or connect via FTP to your Node.js application directory. Step 2: Create or Modify Your Cluster Script Instead of running a single instance, use the built-in cluster module in Node.js to spawn multiple workers. Hereโ€™s an example cluster setup: const cluster = require(‘cluster’); const os = require(‘os’); const http = require(‘http’); if (cluster.isMaster) { const numCPUs = os.cpus().length; console.log(`Master process is running. Forking ${numCPUs} workers…`); for (let i = 0; i < numCPUs; i++) { cluster.fork(); } cluster.on(‘exit’, (worker, code, signal) => { console.log(`Worker ${worker.process.pid} died. Starting a new worker.`); cluster.fork(); }); } else { // Worker processes run your app code http.createServer((req, res) => { res.writeHead(200); res.end(`Handled by worker ${process.pid}\n`); }).listen(process.env.PORT || 3000); console.log(`Worker ${process.pid} started`); } Step 3: Update Your cPanel Node.js Application Entry Point In your cPanel Node.js app setup, ensure the Application Startup File points to your cluster script (e.g., cluster.js), instead of the usual app.js or server.js. Step 4: Restart Your Node.js Application After saving your changes, restart your Node.js app from cPanelโ€™s Setup Node.js App interface. This will launch your cluster workers. Step 5: Verify Your Cluster is Running Open your application in the browser multiple times or refresh rapidly. You should see different worker PIDs handling requests (if you use the example code above). Tip: Logging process.pid in your app helps monitor which worker handled each request. Troubleshooting If your app fails to start, check your startup script path in cPanel. Ensure your app listens on the port assigned by cPanel (process.env.PORT), not a hardcoded port. Check error logs in cPanelโ€™s Errors or Raw Access Logs section for clues. Additional Recommendations Use process managers like pm2 if you have SSH access for advanced clustering and monitoring. Regularly monitor resource usage to avoid overloading your server. Implement health checks and graceful shutdowns for your workers to improve stability. Need Help? For assistance with Node.js clustering or app deployment on Hiverift, contact our support team at dev@hiverift.com. ยฉ 2025 Hiverift. All rights reserved.
Setting Up Reverse Proxy for Node.js with NGINX in cPanel
May 26, 2025

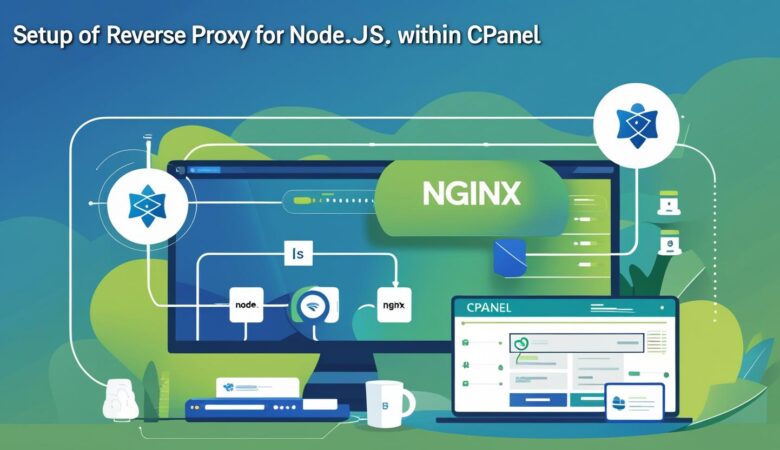
Setting Up Reverse Proxy for Node.js with NGINX in cPanel Node.js applications often run on ports that are not accessible directly via standard HTTP/HTTPS ports (80/443). To serve your Node.js app publicly and securely, setting up a reverse proxy with NGINX is a common and effective solution. This guide walks you through configuring NGINX as a reverse proxy on a server with cPanel to forward traffic to your Node.js application. What is a Reverse Proxy? A reverse proxy is a server that sits between client requests and backend servers, forwarding client requests to the backend and returning responses transparently. Using NGINX as a reverse proxy for Node.js allows you to: Serve your app on standard HTTP/HTTPS ports Handle SSL/TLS termination Load balance traffic (if needed) Improve security and performance Prerequisites Root or sudo access to your cPanel server Node.js application running on a local port (e.g., 3000) NGINX installed on the server Basic familiarity with SSH and command line Step 1: Access Your Server via SSH Login to your cPanel server via SSH using a terminal: ssh your-user@your-server-ip Ensure you have root or sudo privileges to edit NGINX configuration files. Step 2: Verify Node.js Application is Running Check that your Node.js app is running on a specific port, for example 3000: curl http://localhost:3000 This should return your applicationโ€™s response. Step 3: Locate NGINX Configuration Directory NGINX config files are usually located in: /etc/nginx/nginx.conf (main config) /etc/nginx/conf.d/ (directory for site configs) /etc/nginx/sites-available/ and /etc/nginx/sites-enabled/ (depending on your setup) Consult your hosting provider or use nginx -t to locate and verify config files. Step 4: Create NGINX Reverse Proxy Configuration Create a new config file or edit your existing site config in /etc/nginx/conf.d/your-node-app.conf (replace your-node-app with your app name): sudo nano /etc/nginx/conf.d/your-node-app.conf Add the following server block: server { listen 80; server_name yourdomain.com www.yourdomain.com; location / { proxy_pass http://localhost:3000; proxy_http_version 1.1; proxy_set_header Upgrade $http_upgrade; proxy_set_header Connection ‘upgrade’; proxy_set_header Host $host; proxy_cache_bypass $http_upgrade; } } Explanation: listen 80;: NGINX listens on standard HTTP port 80. server_name: Your domain or subdomain. proxy_pass: Forwards requests to your Node.js app running on localhost port 3000. Headers ensure proper handling of WebSocket and HTTP upgrades. Step 5: Test and Reload NGINX Test NGINX configuration syntax: sudo nginx -t If the test is successful, reload NGINX to apply changes: sudo systemctl reload nginx Step 6: (Optional) Enable SSL with Letโ€™s Encrypt Use certbot to generate SSL certificates and secure your site: sudo certbot –nginx -d yourdomain.com -d www.yourdomain.com Certbot will automatically modify your NGINX config to support HTTPS and redirect HTTP traffic. Step 7: Verify Your Setup Open your browser and visit http://yourdomain.com or https://yourdomain.com. You should see your Node.js app served through NGINX. Troubleshooting Tips Check NGINX error logs at /var/log/nginx/error.log for issues. Ensure Node.js app is running and accessible on the specified port. Verify firewall rules allow traffic on ports 80 and 443. Confirm DNS records for your domain point to your serverโ€™s IP. Conclusion Setting up NGINX as a reverse proxy in front of your Node.js app on a cPanel server allows you to serve your app securely and efficiently on standard web ports. With SSL termination and improved request handling, your appโ€™s performance and security are enhanced. ยฉ 2025 Hiverift Hosting | Node.js & NGINX Reverse Proxy Guide

Running Node.js with PM2 on Hiverift Through cPanel Access
May 26, 2025

Running Node.js with PM2 on Hiverift Through cPanel Access PM2 is a powerful production-grade process manager for Node.js applications. It ensures your app stays online, restarts on crashes, and simplifies log management. This guide walks you through running your Node.js app with PM2 on Hiverift shared hosting using cPanel and SSH access. ๐Ÿ“ฆ What Youโ€™ll Need Hiverift shared hosting account with Node.js and SSH access Access to your cPanel dashboard Your Node.js project (with server.js or similar entry point) ๐Ÿ” Step 1: Enable SSH in cPanel Login to your Hiverift cPanel Navigate to SSH Access under the Security section Note down the SSH credentials (username, hostname, port) Use a terminal or SSH client like PuTTY to connect: ssh username@yourdomain.com -p 22 ๐Ÿ› ๏ธ Step 2: Install PM2 via SSH Once connected via SSH, run the following command to install PM2 locally in your project: npm install pm2 –save Or install it globally if your environment allows: npm install pm2 -g ๐Ÿ“‚ Step 3: Upload Your Project to the Server Using cPanel’s File Manager or Git: Upload your project folder into a directory like ~/myapp Or clone your repo: git clone https://github.com/yourusername/yourapp.git Navigate into the project directory: cd myapp ๐Ÿ“ฆ Step 4: Install Dependencies Ensure your package.json is present, then run: npm install ๐Ÿš€ Step 5: Start the Node.js App with PM2 Use PM2 to start your application: pm2 start server.js –name myapp This command: Starts your app Names the process myapp for easier management Keeps it running in the background ๐Ÿ“ Step 6: Configure Environment Variables (Optional) Create a .env file in your project root: PORT=3000 DB_URI=mongodb+srv://username:password@cluster.mongodb.net/app Make sure your app uses dotenv to load variables: require(‘dotenv’).config(); ๐Ÿ”„ Step 7: Save and Auto-Start PM2 Processes To ensure PM2 restarts your app after a reboot: pm2 save This saves the current state of your running apps. Then, add PM2 startup script (works if your shared host supports it): pm2 startup Note: Some shared hosts restrict the use of startup scripts. In that case, restart apps manually via SSH when needed. ๐Ÿ“Š Step 8: Monitor and Manage Your App List running apps: pm2 list Restart app: pm2 restart myapp Stop app: pm2 stop myapp View logs: pm2 logs myapp ๐Ÿ›  Troubleshooting Tips Permission denied errors? Ensure proper permissions for your app folder Port already in use? Change the port in .env or app App not running? Check logs using pm2 logs โœ… Benefits of Using PM2 Automatic process restarts on crash or failure Log aggregation and real-time monitoring Easy management of multiple apps Works well on shared servers with SSH support ๐Ÿ“Œ Conclusion PM2 is a powerful way to ensure your Node.js apps on Hiverift stay up and running. Even on shared hosting, combining cPanelโ€™s file management with SSH and PM2 gives you near-VPS level control. With proper setup, your production applications will be robust, resilient, and easier to maintain. ยฉ 2025 Node.js Hosting Guide | Running with PM2 on Hiverift

Fix Node.js Deployment Errors on Hiverift Using cPanel Tools
May 26, 2025

Fix Node.js Deployment Errors on Hiverift Using cPanel Tools Deploying Node.js applications on Hiverift hosting via cPanel is usually straightforward, but sometimes you may encounter errors that prevent your app from running smoothly. This guide will help you identify and fix common Node.js deployment errors using the powerful tools provided by cPanel. Common Node.js Deployment Errors App fails to start or crashes immediately Dependency installation errors Port binding issues File permission errors Environment variable misconfiguration Git deployment conflicts or errors Step 1: Check Error Logs in cPanel cPanel provides error logs that are crucial to understanding what went wrong. Login to cPanel and navigate to Metrics > Errors. Review the recent error messages related to your Node.js app. Also, check the Node.js Application Logs if available in the Setup Node.js App section. Step 2: Verify Your Node.js Version Incompatible Node.js versions can cause runtime errors: Go to Setup Node.js App in cPanel. Check the Node.js version set for your application. Match it with the version your app supports (check engines field in package.json if specified). Update the version if necessary and restart the app. Step 3: Reinstall Dependencies Dependency issues are common. Reinstalling can fix missing or corrupt packages: Open the Terminal in cPanel or use SSH. Navigate to your app directory, for example: cd ~/your-node-app Run: npm install Check for any errors during installation and resolve them. Step 4: Configure Environment Variables Correctly Misconfigured environment variables often cause failures: In cPanel, under Setup Node.js App, locate the Environment Variables section. Verify that essential variables like PORT, NODE_ENV, and database credentials are correctly set. Remember, your app should listen on the port assigned by cPanel (process.env.PORT). Step 5: Check File Permissions Incorrect permissions can block your app from reading or writing files: In cPanel File Manager, verify your app files have read and execute permissions for the user running the Node.js app. Directories should typically have 755 permissions and files 644. Use the Terminal or SSH to modify permissions if needed: chmod -R 755 ~/your-node-app Step 6: Resolve Port Binding Conflicts Your app must use the port assigned by the hosting environment: Never hardcode a port like 3000; instead, use: const port = process.env.PORT || 3000; This ensures your app binds correctly on Hiverift. Step 7: Handle Git Deployment Errors If you use Git for deployment, conflicts or permission issues may arise: Pull the latest code carefully and resolve merge conflicts. Ensure the repository directory is writable by cPanel and your user. Use the cPanel Git Version Control interface to manage and troubleshoot repositories. Step 8: Restart the Application Properly After fixes, restart your app to apply changes: Use the Setup Node.js App section in cPanel to restart. Alternatively, use pm2 restart <app_name> if you manage the app with PM2. Additional Tips Use console.log liberally to debug issues locally before deploying. Test your app in a local environment matching the Node.js version used on Hiverift. Check for any server resource limitations (RAM, CPU) on your hosting plan. Conclusion By leveraging cPanelโ€™s powerful tools and following these troubleshooting steps, you can efficiently diagnose and fix Node.js deployment errors on Hiverift hosting. Keeping your environment configured correctly and monitoring logs regularly will ensure your Node.js applications run smoothly and reliably. ยฉ 2025 Hiverift Hosting | Node.js Deployment Troubleshooting Guide

Build Your Website with HiveRift

From professional business to enterprise, weโ€™ve got you covered!

ยฉ2025, Hosting. All Rights Reserved by KhatuShyam Technologies

HiveRift
Privacy Overview

This website uses cookies so that we can provide you with the best user experience possible. Cookie information is stored in your browser and performs functions such as recognising you when you return to our website and helping our team to understand which sections of the website you find most interesting and useful.